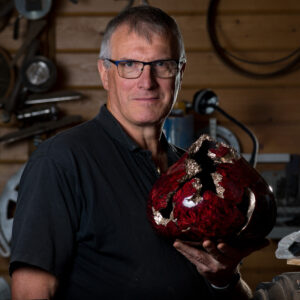
Born in Sydney, Australia, Phil grew up with a father who was a woodworker and antique restorer so wood has always paid a major role in his life.
Phil’s first introduction to woodturning came at the age of 13 when his father acquired an 1870’s American cast iron child’s treadle lathe. Woodturing became a serious hobby in his late 20’s and after a six year spell in the travel industry, he took the decision become a professional woodturner in 1994. His knowledge and appreciation of English timbers was initially gained from working as a tree surgeon / forester for several years.
He has won numerous awards in national competitions and is regularly invited to teach and demonstrate his techniques nationally and internationally including in France, Italy, Belgium, Holland, Spain, Germany, Finland, Ireland, Norway, New Zealand and the USA. Phil’s hands on teaching style has meant that over the past 19 years his annual course at Dreschelstube Neckarsteinach, the woodturning school in Germany, has attracted hundreds of woodturners keen to be taught about form and function in woodturning.
Phil is the author of the best selling project book ‘Woodturning: Two in One‘. The book has been translated into 9 languages and to date is the only English woodturning project book to have been translated into Italian.
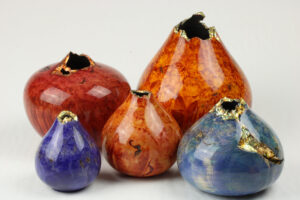
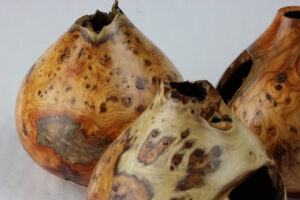
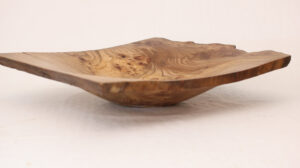
He is best known for his vessels and hollow forms with clear, fluid shapes and flowing lines. He uses contemporary coloured dyes to enhance hidden figure in pale woods, mostly sourced from tree surgeons and firewood merchants.
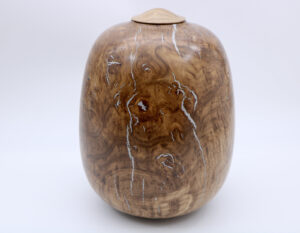
With the addition of threaded lids, his vessels lend themselves to becoming urns. He specialises in these beautiful functional pieces and they are highly sought all over the world. Phil describes his urns as ‘functional art’ that can be displayed whether they contain ashes or not.
It is a huge honour that people want to keep the ashes of their loved one in a piece of my artwork.
He is the current President of the Association of Woodturners of Great Britain and a member of the American Association of Woodturners.
ROTATION 1:
Hollow forms using the KISS principle
All the external shaping of my hollow forms is done with two tools, a ⅝ ” (16mm) bowl gouge with a parabolic flute and a modified Celtic grind. I use it for roughing cuts, squaring up the end of the blank, creating the shape and partially creating the chuck spigot. In my workshop I have a mix of manufacturers tools, Hamlet, Henry Taylor, Robert Sorby, Vicmarc and Woodcut, I use a Hamlet gouge in the workshop just because it has the most comfortable handle for me and the best flute shape.
The other tool is a Phil Irons shear scraper by Woodcut tools.
This tool is used to refine the outside shape of all my forms and bowls, it gives me the best uniform surface without sanding which is crucial when it comes to do the colouring. It is sharpened with a fine diamond hone to give a very fine edge that leaves no grinding marks on the wood. I think of it as a turner’s version of a scraper that a cabinet maker uses.
The Woodcut ProForme hollowing tools are my weapon of choice for all my hollow forms with an opening larger than 30mm, anything with a smaller opening I use John Jordon hollowing tools which have a small 3mm scraper tip.
ROTATIONS 3 and 8:
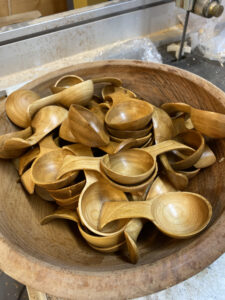
Caddie Spoons
(note: spoons for measuring tea and coffee)
I have been making these for more than 25 years and in that time I have made more than 15,000 of them. They started as a project from Richard Raffan’s book Turning Projects and the process and techniques have evolved over the years to cope with the quantities that I was being asked to make.
I use mainly fruit woods from trees that I convert myself with chainsaw and bandsaw into 55 mm x 55mm x 350mm lengths, discarding anything with heartwood or defects. All the converted lengths are then turned to cylinders and cut into 3. These are then loaded into a tall upright fridge kiln and dried over a period of 3 – 4 weeks. Depending on the size of the tree I normally produce 200 – 300 blanks at a time, enough to potentially make 400 – 600 spoons as each blank will yield 2 spoons.
ROTATIONS 4 and 9
Colouring to Enhance
Over the last 30 years I have developed this technique using commercial stains to enhance the hidden figure in white woods such as Black Poplar, Sycamore, Horse Chestnut, Maple etc.
I show the importance of good form, accurate chucking, surface prep, layering the colours and how essential it is to sand properly and efficiently, then how I apply the lacquer and finally reverse chuck to remove the spigot. There are no short cuts when it come to achieving a quality finish but I’ll show you a few tricks to speed the process up a little.
ROTATION 6:
Kintsugi for Wood
Wood is a natural material, this is what attracts many of us to it in the first place. As a natural material it isn’t consistent and often has within it variations such as voids, bark inclusions and a whole range of other “inconsistencies” (including chainsaw cuts!!).
If I were to search for only “perfect” pieces of timber then frankly I’d never make anything as I would spend all of my time on a Unicorn hunt!
Part of the beauty of the things I make lies in the inclusion and celebration of so called “flaws”. It’s not an approach that I can claim as my own. I refer to this as “Kintsugi for Wood”.
The Japanese tradition of Kintsugi is something that I have been interested in for many years. You can read more about this fascinating subject on the Internet, this article on Wikipedia should get you started: https://en.wikipedia.org/wiki/Kintsugi
Over the years I have been developing my work I have put together a number of methods that I use to handle a range of “problems” that always seek to celebrate the “wabi-sabi” nature of this fabulous material. We will explore how I use metal powder, metal leaf, epoxy and holographic particles to create unique works of art.
